
A distribution list is a simple way to send one email to multiple people at once. The list contains members and has its own email address. When you email the list, the system automatically sends the email to all members. This mechanism is useful for company-wide announcements, or discussion groups, etc. This guide explains how to create distribution lists in Google Workspace.
Types of distribution lists
In Google terminology, a distribution list is a group. A group is a set of users. Google provides a lot of options, enabling you configure the exact behavior desired for your group. Here are a few common scenarios:
- A public distribution list to post announcements. In this type of distribution list, members join because they want to receive announcements, e.g., new versions of an application. Typically, members cannot post into the group and cannot see other members. Only the group owners can post.
- A private distribution list to publish reports. For example, you can instruct your finance team to send a daily report with KPIs (key performance indicators). Since this group contains sensitive information, membership is typically controlled (approval required) but often members are permitted to reply and ask questions.
- A list of people with access to a resource such as a shared drive. This is a security group. Members need approval to join (otherwise it is useless as a security group), and for extra security, members may be restricted from seeing other members.
These are just examples of the kinds of groups you can create using various combinations of the options. We will walk through the major options you need to set during creation of the group.
Where to manage groups in Google Workspace
To manage groups, you go to the Groups section of the Admin page.
- Sign into your Google Workspace account.
- Select Admin from the menu next to your profile in the upper-right corner.
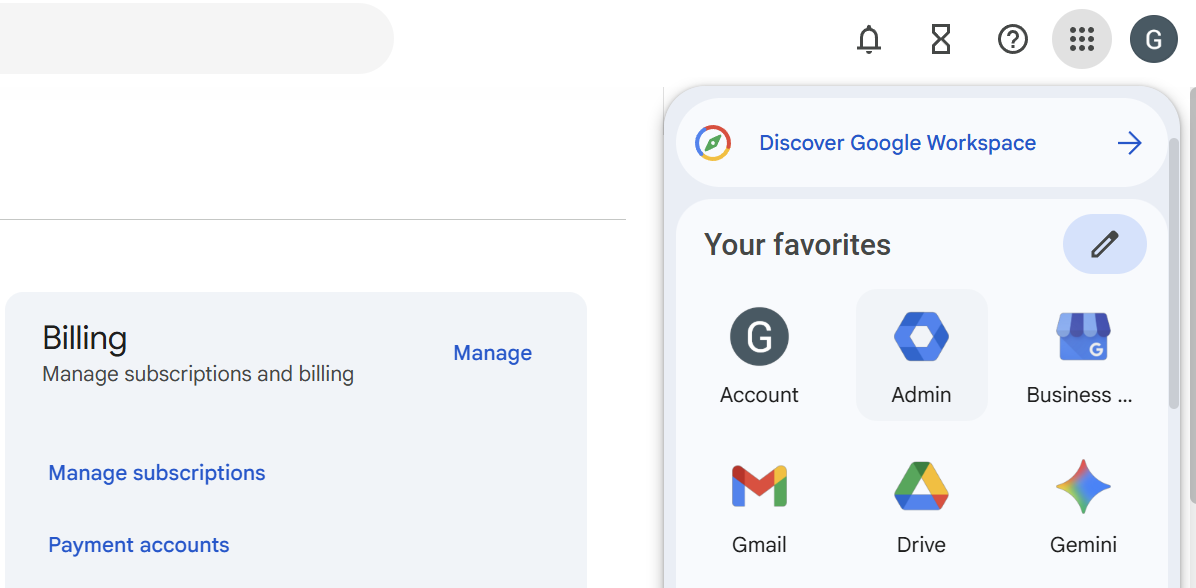
- Scroll down and click Groups.
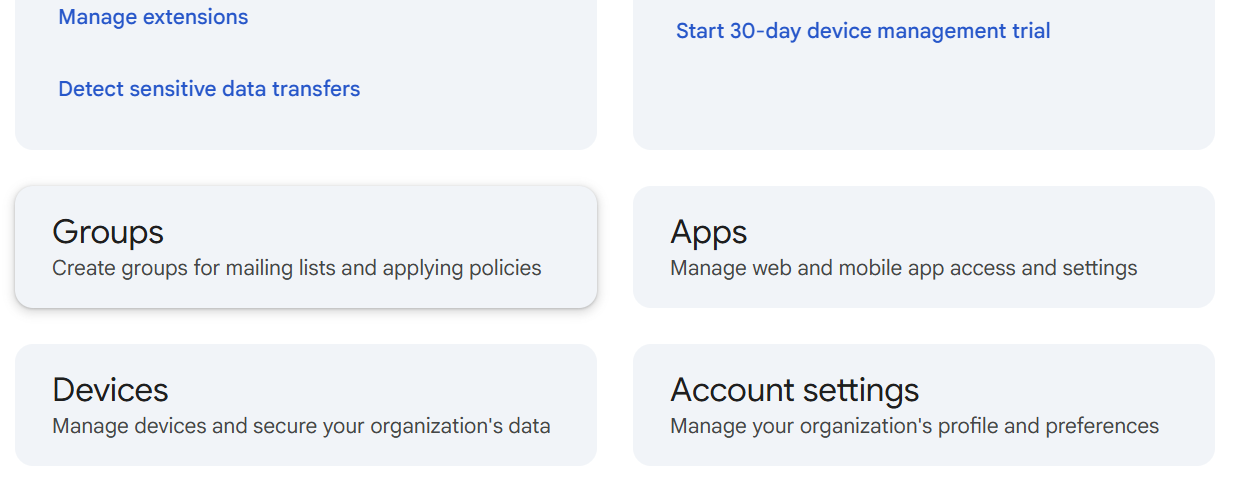
You should see a list of groups and a button to create a new group.
How to create a group in Google Workspace
Step 1: Specify group details
- If you haven’t already, go to the Groups admin page (see above).
- ClickCreate group.
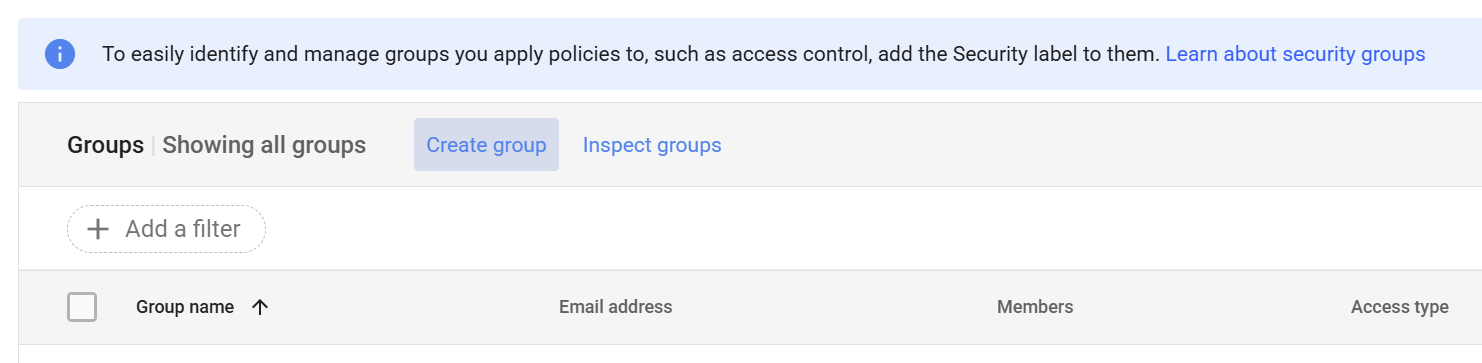
- Enter the details of the group (see table below).
- Click next.
You specify the following options in this step (* means required):
| Group name* | The name of the group as you want it to appear in lists and messages. You can change the name later. |
| Group email* | The email address of the group. When you send messages to this email address, they will be sent to all members of the group. You can change the email address later. |
| Group description | A description of the group to help people understand its purpose. You can change this later. |
| Group owners | One or more people who will have administrative rights over the group. Owners can also be changed. |
| Group labels | Indicates whether this is a security group. A group is always a mailing group (a distribution list), but you can also tag it as a security group. When configured as a security group, you can use it to control access to resources. For example, when setting the permissions of a shared folder, you can specify that members of the group have read/write access. You cannot remove the security tag after setting it. |
*required
Step 2: Set permissions
In step 1 (above), you defined the core options such as name and description. In step 2, you define the access permissions of the group. These permissions control how people interact with the group.
Understanding access permissions of groups
Access permissions allow you to control the following:
- Who can contact group owners
- Who can view conversations
- Who can post
- Who can view members
- Who can manage members (add, invite, approve)
The correct answers depend on the purpose of the group. If your group is doing something confidential, you probably want to keep it locked down. On the other hand, if the group is for coordinating after-work happy hours, you can be more liberal.
With this in mind, review the matrix of permissions. Each row represents a type of action such as viewing conversations. Each column represents a type of person. For each combination of row and column, a cell can be empty (not permitted) or have a checkbox (permitted). Review the following example:
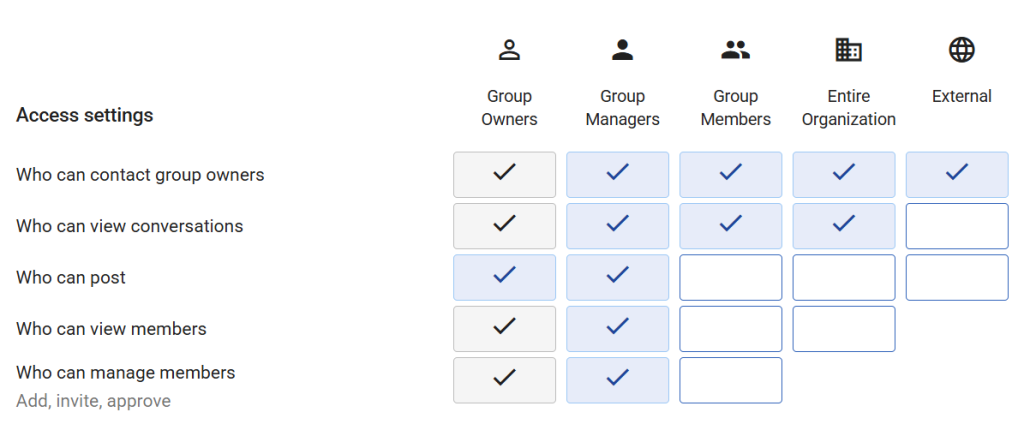
In this example, anyone is permitted to contact group owners (see first row). However, only people in the organization are permitted to view conversions (second row). Only managers and group owners are allowed to post (last three rows).
You can click any cell to toggle the permission for that action and type of person. To save time, the top of the screen has a few presets that you can select for common scenarios. When you select one of these presets, the matrix is updated with the permissions for that scenario.

| Scenario | Description |
|---|---|
| Public | Anyone in your organization can post to and join the group |
| Team | Anyone in your organization can post to the group, but they must ask to join |
| Announcement Only | Only group owners and managers can post to the group, and anyone in your organization can join |
| Restricted | Only group owners, managers, and members can post to the group, and people in your organization must ask to join |
| Custom | When you change a setting for another access type, it becomes Custom |
The presets are not “types” of groups. They apply a set of permissions for a common scenario such as an announcement-only distribution list. You can still click (change) any cells after applying a preset.
Deciding who can join a group
In addition to permissions, you need to decide how people join the group. You have three options:
- Anyone in the organization can ask to join
- Anyone in the organization can join
- Only invited users can join
The correct answer depends on the purpose of the group. If the group will distribute sensitive information such as financial reports, then lock it down. If the group is marketing in nature (e.g., product announcements), make it easy to join without approval.
Enabling external users
Lastly, you can decide whether to allow external users to be in the group. An external user is someone outside of your Google Workspace. External users don’t need to be on the Google plan; they just need a valid email address.
Step 3: Save, confirm, and look at advanced settings
Once the permissions are satisfactory, click Done. You should see a confirmation screen once the group is created. You will also see a link to start adding members to the group, if you wish.
Known issue: login prompt after clicking Done
Google may prompt you to re-enter your password when clicking the Done button. If this happens, be sure to re-enter your correct password, and then confirm whether the group was created. If the group is not listed, and you don’t remember seeing a confirmation screen, you’ll need to start over and create the group. Fortunately, you should not be prompted for your password again as long as you re-entered the correct password when first prompted.
Advanced settings
Later, you can return to the groups list to view or change settings. Note that groups have additional advanced settings that were not presented during the creation steps. For example, you can define a welcome message that is automatically sent to people who join the group. Take some time to explore the advanced settings.
Adding members
Once a group is created, you need add and remove members. If you enabled external users, you can add people outside of your Google Workspace, e.g., people on a different domain name.
Unsubscribing
To remove themselves from the group, recipients can send an email to address+subscribe@example.com, where address is the email address of the group, and example.com is your domain name. A reminder is attached to the bottom of emails sent to the list.
To unsubscribe from this group and stop receiving emails from it, send an email to reports+unsubscribe@example.com.References
- Control access to sensitive data with security groups (google.com) – As an administrator, you can use security groups to control access to sensitive information and resources. You can create a new group or update an existing group to a security group.

 You are free to share and adapt this content for any purpose as long as you give appropriate credit in a reasonable manner.
Leave a Reply