Normally you develop a plugin on your devbox and then upload the ZIP file to your WordPress site. However, sometimes it is useful to create a small plugin directly on your site using a file manager such as WP File Manager. For example, you need to write more complicated code than supported by a code snippet plugin.
To complete these steps, you need access to the file system of your WordPress website. You can do this with a file manager such as WP File Manager, or you can do this over SFTP, and lastly, some hosting companies provide an online file manager. The keys you need to complete include:
- Creating a folder
- Uploading or saving files
Hello World Message – Demo Intro
This is a simple WordPress plugin created for demonstration purposes.
When activated, it shows a friendly “Hello World” message at the top of every page on your website. It’s a minimal example of how plugins can add content to your site.
Instructions
- Create the plugin folder
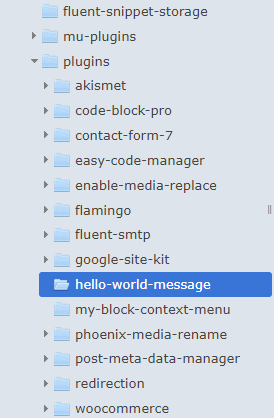
Create a folder called hello-world-message in the wp-content/plugins/ folder.
.
- Open a text editor (like Notepad).
- Copy the code below into a new file.
- Save it as hello-world-display.php.
- Upload it to your WordPress site in:
/wp-content/plugins/hello-world-message/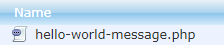
- Go to WordPress Admin → Plugins, find Hello World Message, and click Activate.
- Visit your site → You’ll see Hello World at the top of every page.
<?php
/*
Plugin Name: Hello World Message
Description: A simple plugin to show "Hello World" floating at the bottom of the site and admin screens.
Version: 1.0
Author: Your Name
*/

/*
|--------------------------------------------------------------------------
| FRONT-END FLOATING MESSAGE
|--------------------------------------------------------------------------
| - Hook: `wp_footer`
|   Runs before the closing </body> tag on public-facing pages.
| - We add a floating <div> that stays pinned to the bottom of the viewport.
*/
add_action('wp_footer', function() {
    /*
     * CSS explanation:
     * - position:fixed → pins the element relative to the viewport,
     *   not the normal page flow.
     * - bottom:0; left:0; right:0 → stretch across the bottom of the screen.
     * - background:#fffae6 → pale yellow background so it stands out.
     * - padding:10px → gives breathing room inside the box.
     * - text-align:center → centers the "Hello World" text.
     * - font-weight:bold → makes the text stand out.
     * - z-index:9999 → ensures it stays above other elements like footers.
     */
    echo '<div style="position:fixed; bottom:0; left:0; right:0; background:#fffae6; padding:10px; text-align:center; font-weight:bold; z-index:9999;">
            Hello World (Front-End)
          </div>';
});

/*
|--------------------------------------------------------------------------
| ADMIN DASHBOARD FLOATING MESSAGE
|--------------------------------------------------------------------------
| - Hook: `admin_footer`
|   Runs before the closing </body> tag on every /wp-admin/ page.
| - We use the same technique as front-end but a different background color.
*/
add_action('admin_footer', function() {
    /*
     * CSS explanation:
     * - Same as above but different background (#e6f7ff → pale blue).
     * - This keeps it visible without clashing with the WP admin UI.
     */
    echo '<div style="position:fixed; bottom:0; left:0; right:0; background:#e6f7ff; padding:10px; text-align:center; font-weight:bold; z-index:9999;">
            Hello World (Admin Dashboard)
          </div>';
});

/*
|--------------------------------------------------------------------------
| HOW IT WORKS
|--------------------------------------------------------------------------
| 1. Plugin is activated and loaded by WordPress.
| 2. add_action('wp_footer') inserts our floating message for site visitors.
| 3. add_action('admin_footer') inserts a floating message for admin users.
| 4. Both use CSS position:fixed so the messages stay visible
|    even while scrolling.
| 5. The z-index keeps them above all other content.
*/
Reference
- Introduction to WordPress Plugins
- Plugin API Hooks
- Plugin Security Best Practices
- Internationalization (i18n) for Plugins
- add_action() Reference
- add_filter() Reference
- register_activation_hook() Reference
- register_deactivation_hook() Reference
- Settings API Overview
- WordPress REST API Handbook
Leave a Reply